Uncategorized

Show some Motion!

One thing that new(er) photographers think is out of reach for them is taking pictures of moving subjects. What they don’t realize is that the end result doesn’t necessarily have to be totally sharp or in focus. Playing around with slower shutter speeds not only teaches you how your camera works, but it can create some of the most exciting and interesting results for novices.

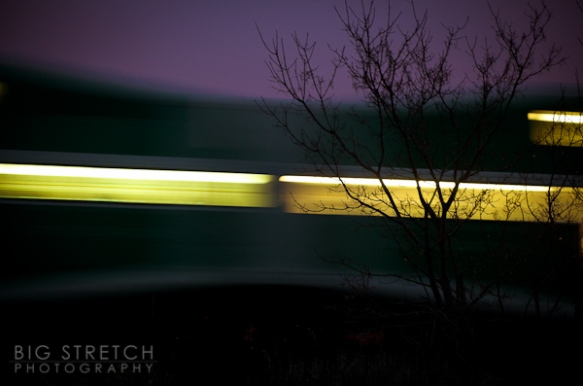
Take the example below. To show motion like this, it is simply a matter of choosing a slower shutter speed (recipe after the pic)…

Show some motion!

To add interest/contrast to this pic, I placed the tree in the foreground so I would have something sharp in my frame to offset the blurriness of the moving train.

Recipe for this shot:

  • Shutter Priority mode (S or Tv)
  • Dial in a shutter speed of 1/8 of a second or slower
  • Use a low (100-400) ISO value to retain detail
  • Stabilize your camera (a tripod is preferred, but anything that will prevent camera movement can be used)
  • Turn on your camera’s 2 second timer to avoid unintended camera movement when you press the shutter button down

Get out and try this, it’s easy and fun. It doesn’t have to be dark out, but try to avoid experimenting with this in bright sunlight, as it can result in overexposed images.

Feel free to leave some feedback below if you try this…

Bounce Beware

Just a quick tip today (maybe if I did more of these I would post more regularly)…

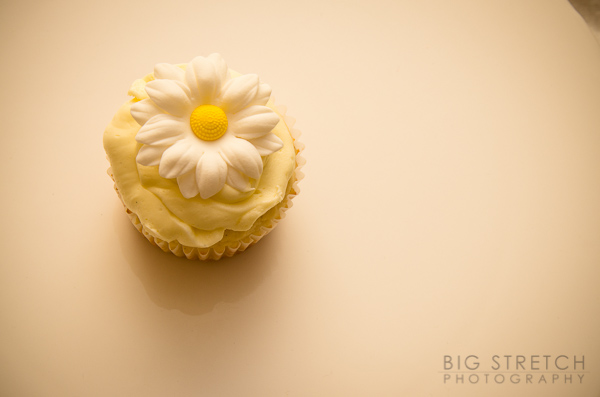
If you are using an external flash and bouncing that flash off a ceiling, wall, etc. for diffusion (which you should be), be aware of the colour of the surface you are bouncing off of, as the light from the flash will take on that colour in your photo.

Cupcake with Flash bounced off white ceiling

Cupcake with Flash bounced off white ceiling

Cupcake with Flash bounced off Beige/Yellow wall

Cupcake with Flash bounced off Beige/Yellow wall

M-M-M-Macro

For those of you who have attended one (or more) of my classes through Henry’s School of Imaging (www.schoolofimaging.ca), there was likely at least one point where I deviated from the curriculum and went on a tangent about how much I love Macro photography and Macro lenses. In addition to being able to focus at very close range (sometimes within an inch of your subject, whereas a standard lens often requires you to be about a foot away), Macro lenses are also widely heralded for their unparalleled sharpness and fantastic Bokeh (the out of focus area in the picture below).

Nice sharpness and Bokeh produced by a 100mm Macro lens...

The primary reason I gravitate towards close-up macro photography is simply because it can produce something that we can’t see with the human eye. For example, if you bring an object to within an inch of your eye, you won’t be able to focus on it. However, with a Macro lens you can, and depending on the lens, it is often magnified even further.

It looks like a hidden level on Qbert, but it's a close-up of a reflector on my Jeep...

When I’m feeling photographically uninspired, I will oftentimes throw on my Macro lens and explore what would normally be mundane, everyday subjects, discovering abstract shapes, lines, textures and patterns (see above and below).

Door Knocker close up... Even things we see every day are more interesting with a Macro lens.

One thing you have to be aware of when shooting with a macro lens is that you often need a tripod for the best results. Because you are in such close proximity to your subject, camera movement becomes more of an issue when hand holding. Think of this in the same terms as shooting a small subject at a distance with a telephoto lens. Even the slightest movement of your hands will result in a blurry image.

Macro also tends to show imperfections in your subject, so be aware of dirt, etc.

1/3rd is the Word

There is a magic number in photography (what’s up with this guy and magic?). More specifically, there is a magic fraction in photography, and that number/fraction is 1/3 (one-third). It’s quite amazing how often this number comes up in the world of picture taking. Let’s explore some of the places it comes into play…

The Rule of Thirds. Use it!

First off, and probably the most important, is the “Rule of Thirds”. The rule of thirds is, for all intents and purposes, the cornerstone of a good photograph. Basically, it states that your subject should never be placed in the center of your frame, nor should your horizon be placed right across the middle of the frame. Use the tic-tac-toe looking grid above as a visual representation of the rule of thirds. When you take a picture, you should place your subject along one of the lines in that grid. Alternatively, if it is a small subject, or there is a specific point of interest, like an eye in a close-up portrait, you should place it where those lines intersect (the red dots). If we are talking about a landscape photo, you would place your horizon along one of the horizontal lines, depending on whether you want to accentuate, or draw attention to, the sky or the foreground. It’s a pretty simple concept that will take your photography to the next level.

The next place we find the magic number is in the increments of our shutter speed and aperture. By default, our cameras increase and decrease our exposure values in 1/3 stops. This can be changed on most cameras to increase/decrease in 1/2 stops as well, which is how the aperture used to be marked on lenses with an aperture ring.

Lastly, our magic number has a significant influence when focusing. Wherever you place your focus in a picture, you will have 1/3 in front and 2/3 behind that point in focus. This comes into play in most pictures we take, however it is probably most noticeable when taking landscape pictures. A common misnomer in landscape photography is where you should focus to ensure your picture is sharp from foreground to background. Most people assume that they should either focus on the farthest point in the picture (the horizon, for instance), or halfway into the picture. The correct answer here is (yup, you guessed it) 1/3 of the way into your picture to ensure sharpness all the way through.